Installation
.jpg)
.jpg)
Will the Trem King work on MY Guitar?
Click here to see retro fit requirements
Install Instructions download:
Trem King Retro Fit Installation Instructions
The Trem King Model TKS/TK-1 is designed to fit into guitars previously fit with vintage 6-screw or two-post type vibrato systems. The following instructions assume that the guitar being retrofitted has a spring cavity for one of these type vibrato systems. Top routs and Spring Cavities for these types of vibratos are usually very similar.
NOTE: If building a guitar that is not yet routed for a bridge, these instructions do not cover the primary routing of the top rout and spring cavity. Those instructions are readily available on the web; however, the enclosed instructions will take you from that point through installation.
Tools needed:
Philips screwdriver
Drill
1/16” drill bit
1/8” extended drill bit – 12 in. long
Light Grease
Double sided tape
Soldering iron and solder
Hammer
Small punch
Router
Router Template (not included) – CNC cut teplates available
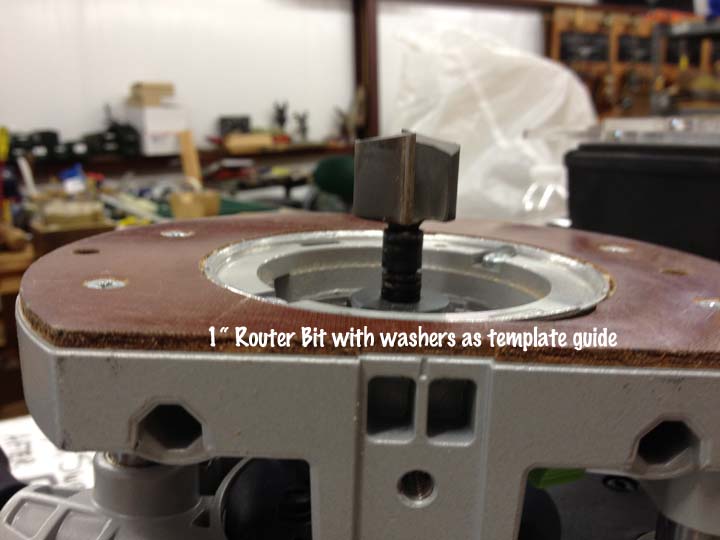
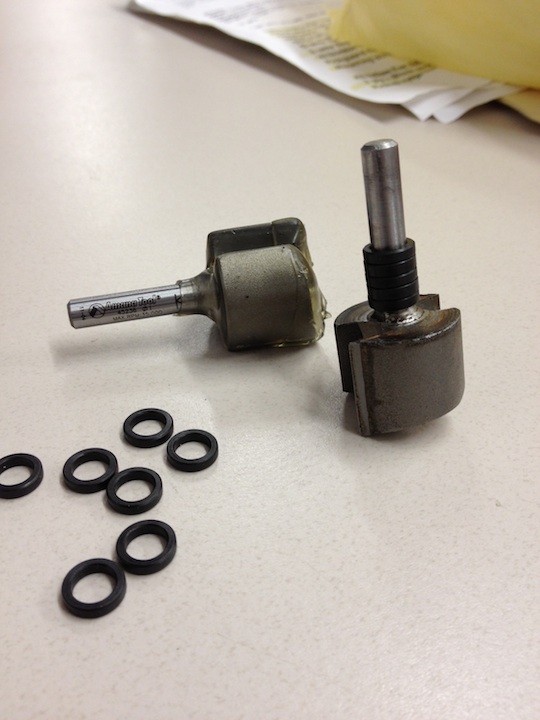
Router bit – Bit by Amana, # 45236. 1-inch diameter straight router bit. ¾ inch tall, ¼ inch shaft.
5 pieces 3/8 in. washer with ¼ inch inner diameter to fit
over shaft of router bit. Put a small amount of light grease over the shaft of the
router bit before putting on washers. Washers will act as template guide.
NOTE: Routing should be done by a qualified luthier
Installation:
1. Remove existing vibrato unit including pickguard, all screws into the body, springs and spring claw. Plug holes on top of guitar with wood dowels. Use wood glue when inserting dowels into body. If the existing vibrato was a 6-screw type, plug the two outside holes with wood dowels. If the existing vibrato was two-post style, pull the inserts out of the body and plug with wood dowels. The dowels must be even with the top of the guitar body when inserted all the way. Plug old spring claw screw holes. Let that dry overnite.
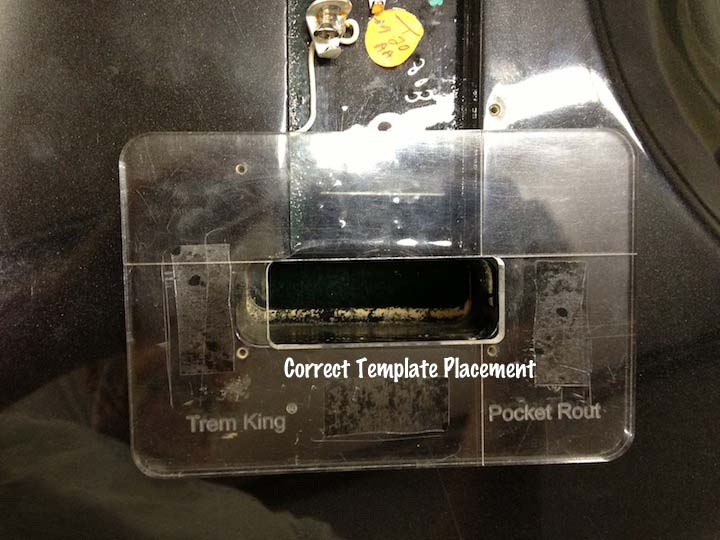
2. Most strats will need a touch on the top rout in order for the Trem King unit to center properly. The diagram below shows placement of the top rout template, if necessary. We recommend Low Stick masking tape to cover areas to be marked. Diagram on the right shows placement of Pocket Rout template on back of guitar.
3. For strat top rout, place guitar face up in routing jig. Place Strat Top Rout template as shown onto face of guitar. Use 3/8” dia. ¾” router bit with top mounted
bearing for this small cut.
NOTE: You will only be cutting the left side of the existing top rout. 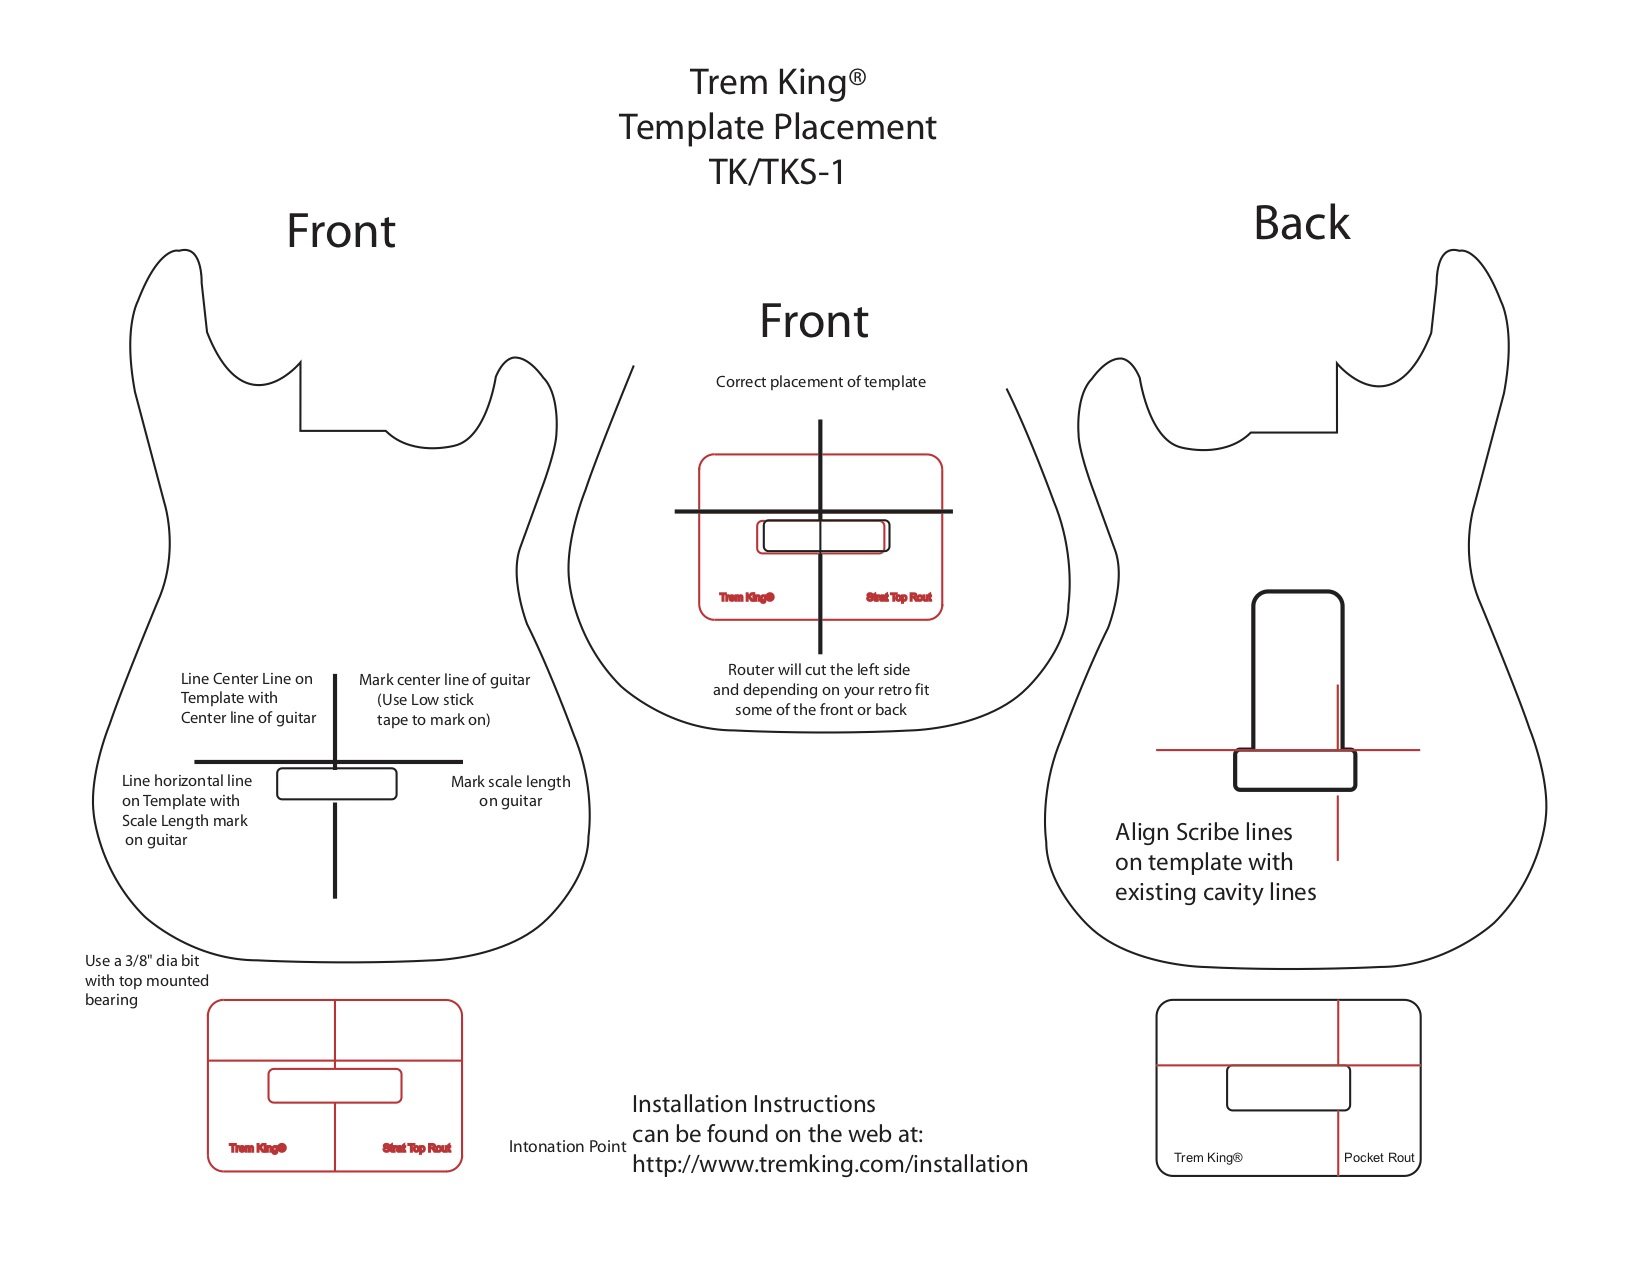
4. After completion of top rout, turn guitar over and place in jig.
5. Place Pocket Rout template on guitar as shown below.
6. Use a 1” dia. ¾” straight bit with a ¼” shank. Use small washers on the shank as template guides.
7. Use Router with suggested bit to rout cavity along front, back and sides of Pocket Rout template. Set depth from router base to top of router bit to .375 in.
This leaves the original shape of your cavity as it was, and starts the rout below the back of the guitar.
8. Rout all the way around template, cutting front, sides and back.
9. Plunge router ¼” and repeat rout.
10. The next diagram shows the measurements of the cuts you have made to the top and spring cavity.
.jpg)
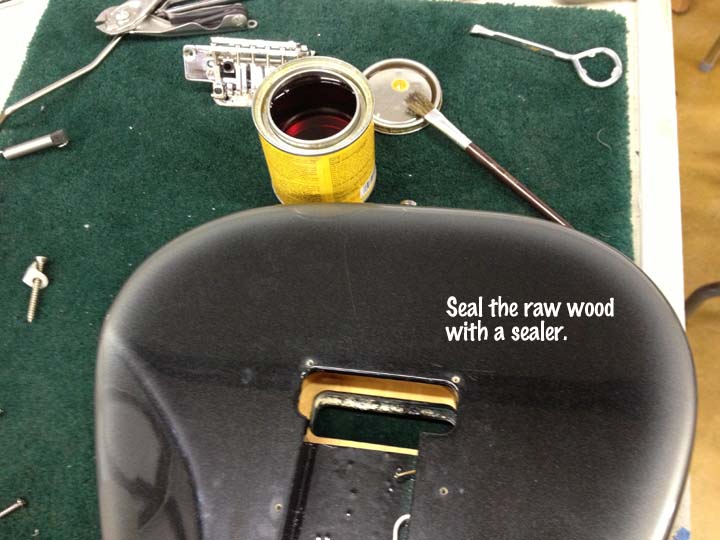
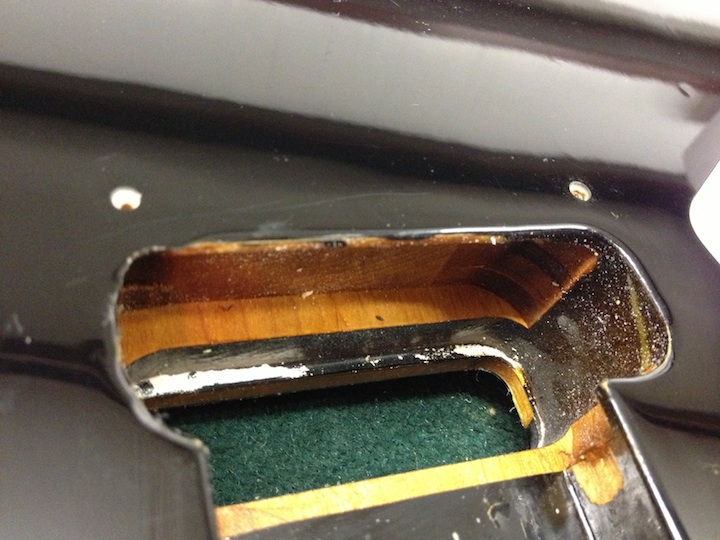
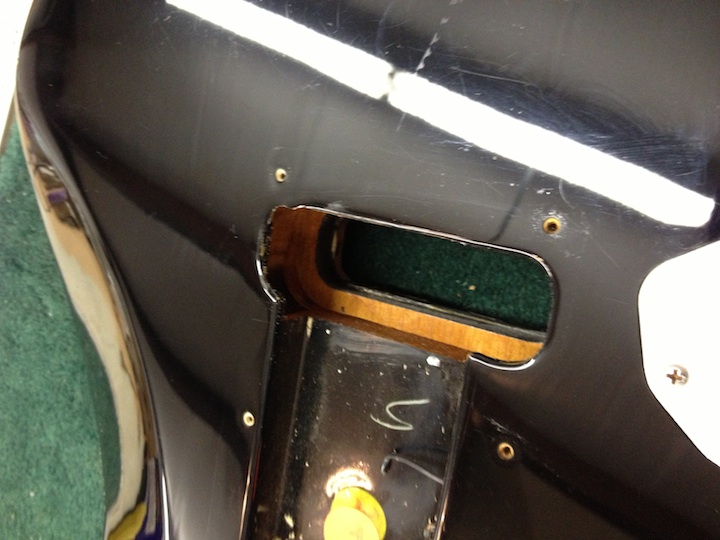
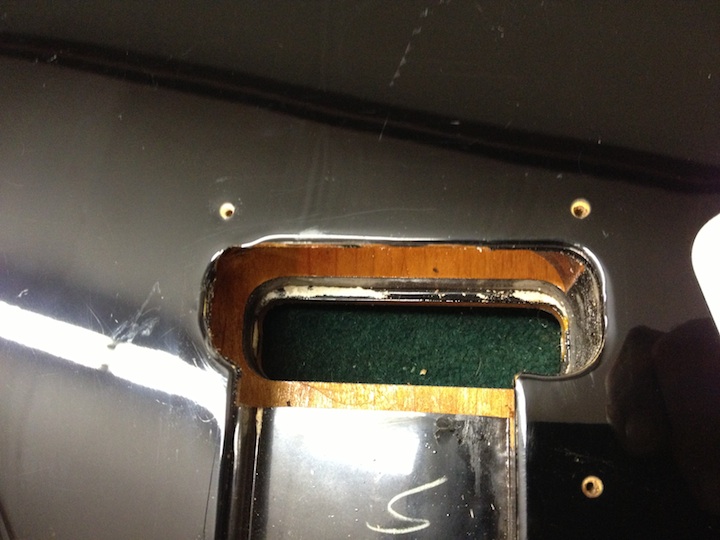
11. Seal raw wood and allow to dry overnite.
12. Remove template, any wood shavings and double stick tape.
13. Place Trem King unit into top of guitar to make sure it fits and tone block can swing both directions. Using the centerline and intonation lines you marked on low stick tape, make sure the TK unit is centered and at the correct distance from the nut.
14. Place Trem King on guitar. Check to make sure the TK unit will fit straight and centered.
15. Measure the distance from the nut to the front of the bridge plate in the center, High E side and Low E side. If it is the same, the bridge is straight.
16. Place a straight edge along the centerline of the guitar down the fret board from the nut to the bridge. The centerline of the Trem King is the center between the ‘d’
and ‘g’ saddles. Align with the centerline of the guitar. Remove if all looks good.
NOTE: At this point with the TK unit in your hand, insert the whammy bar into the tone block (be sure to remove the protective covering from the bar), making sure it is all the way down in the hole. Use allen wrench to tighten two (2) set screws on back of tone block for whammy bar. Tighten to you preference. Also, make sure the Grip Tip is tight. Check both the rubber tip and the metal end for tightness. Remove whammy bar.
Measure Twice, Cut Once
17. With the TK unit placed in the top of guitar and aligned properly, mark three (3) screw holes on top of guitar.
18. Remove Trem King.
19. Use 1/16” bit to drill three (3) holes 1/2” (or less) deep for three (3) #6 woodscrews on top of guitar.
20. Turn guitar over. Drill three (3) spring claw holes ½ - 1” deep holes using a 1/8” extended drill bit. Drill holes approximately ¼ in. from bottom of cavity. The hole in the
middle should line up with the center of the spring cavity. One hole on either side for the tone block springs that should line up with the small holes in the tone block
for tone block springs. Plug any old holes that interfere.
NOTE: by using this long drill bit, you get a straighter angle into the body for
the spring claw screw holes.
21. Install two (2) #8 x 1 ½ in. Button Head philips wood screws with spring claws on them. One (1) claw for the tone block spring and one (1) claw for the tension bar
spring.
NOTE: If using 11 gauge or less strings, only one (1) spring claw will be mounted
for the tone block spring and one spring claw for the tension bar. The tone block
spring can be mounted on either the bass or treble side of the tone block. If using 11
gauge or higher strings, install two (2) spring claws for the tone block and one (1) for
the tension bar.
22. Solder Ground wire to spring claw for tone block. You cannot use the middle spring claw because it does not ground.
23. Mount Trem King unit to top of guitar using three (3) #6 x 1 in. countersunk wood screws. Screws should correspond with the color of your Trem King – chrome,
black, and gold.
24. If your Tension Bar Spring is mounted into the Bar, SKIP this step. If Not - Press fit the spring into hole in middle of the tension bar. Make sure the spring fits snugly
into the hole in the tension bar. The material on the tension bar should be facing towards to body of the spring. Press the 90º end of the Tension Bar Spring through
the hole in the center of the Tension bar. Place the tip that comes out the bottom side into a vise and tighten. Then ‘roll’ the tension bar away from you, bending the tip
over so that the spring will not come out of the bar during use.
25. Mount tension bar behind the tone block so that the material on the Tension Bar rests on the inset pieces on the two arms. Then pull the spring loop up and attach it
to the middle spring claw. The material of the tension bar be firrmly against the right and left arms.
26. The tone block spring should be mounted but only hooked onto the claw AFTER the low e, a, d and g strings have been put on.
27. Before stringing instrument, check all other components of guitar. Make sure:
a. All neck bolts are tight
b. Neck is straight
c. Tuning gear are tight – top nut, screw (if any) on back and button
d. Check nut – we recommend Graphtec nut material. However, high percentage graphite, bone and other materials work well. Inexpensive nut material tends to not work as good and may cause tuning problems. Most roller nuts will work fine.
e. String trees –If the headstock angle is not enough to pull the strings down snug, you will have to use a string tree. If you must use a string tree, we also recommend Graphtech trees.
28. String guitar, loading strings up through tone block. Be sure each string comes out between the proper saddles. Put low ‘e’ and high ‘e’ string on first. Then continue
with a, d, g and b strings.
DISCLAIMER: Alterations or modification to the Trem King voids manufacturer warranty and invalidates returns. If you are unsure of your ability to fit the unit we will be happy to recommend a qualified luthier or guitar tech.
SUPPORT AVAILABLE: The Trem King vibrato is a new, patented design that differs in installation, set-up and adjustment.
Feel free to contact us with questions at rusty@tremking.com or call (803) 546-6400.
Onward,
Trem King® Fixed Bridge Vibrato
Back to top ↑